Dec 3, 2015

The Hour of Code

https://en.wikipedia.org/wiki/Code.org


Computer Science Education Week will take place next week, December 7-13. During this week, you are encouraged to have your students participate in one hour of coding...oh, yeah, and you can participate and learn too as there are coding activities for any age, from kindergarten to adult!

Well, why is coding becoming so important? Because, according to code.org, computer science is a top-paying college degree, and computer programming jobs are growing at an alarming rate.  Here is an introductory video I’m sharing from the Hour of Code.

Using the Hour of Code makes it really easy to implement coding in your classroom.  You can sign up for free, and you can choose to create a class and add your students so you can keep track of their progress, but you don’t have to do that.  You can just have the students use the activities without saving their progress.

There are great new coding activities this year too such as Star Wars and Minecraft, and favorites from years previous are available also such as Anna and Elsa from Frozen and Angry Birds.

So the best way to have your students start coding is to just let them dive in!  I have participated in the Hour of Code since its inception in 2013, and I must emphasize how much the students learn and how much they love it!

Also the Hour of Code doesn’t just have to take place next week.  You can have your class participate in coding at any time!  So sign up your class today, and they can participate all year long at school and/or at home!

One more thing! Even if you don’t have access to computers, you can still teach coding.  The unplugged section has paper/pencil interactive lessons that teach students how computers are programmed. They are fun and challenging activities. Click the link for an example of an unplugged activity for any age.

Oct 25, 2015

Who Am I Project

Teachers!  Here is a project your students can create with a Halloween theme even if you do not wish to highlight a Halloween theme in your classroom.  It is called Guess Who I Am, and there are many different ways that your students can complete this project and have fun with it.

Here is an example of a finished sample project that I just completed using a video creation tool that I just learned about called Stupeflix.  Stupeflix is very simple to use.  You can also apply for an education account and be able to add up to 100 students for free!  Here is a very snazzy video tutorial about how to use Stupeflix, but basically you choose a theme and add photos, videos, and/or text to your storyboard, preview your video, then publish!


Here is the graphic organizer/sentence frame for the Who Am I Project, and here is a mask template that I found at freecoloringpages.co.uk.

There are many other ways you could have your students create this project.  Last year in my classroom, I printed out the mask template for each student, and I had them decorate the mask.  Then I had them handwrite their paragraphs using the graphic organizer.  They cut out their masks and glued them onto a final paper including their writing, and each day I read a few aloud to the class so the class could guess who the classmate was.  Then I hung them on the wall for others to see.  

Another idea is to have students create a Google Slides presentation with an image of their designed masks and writing.  The slides presentation could be shared with the class by the teacher so others could guess who.

I'm sure you have many more ideas for this project too! If so, please share!  I'd love to hear about them, and I'd love to see examples of this project too!  This project is loads of fun, and it definitely involves student creation and creativity!


Oct 22, 2015

Google Cardboard

What is Google Cardboard?

Google Cardboard is a fold-able cardboard viewer that is used to view virtual reality apps. And what is virtual reality?  Virtual reality lets you view the world in 3D!

Assembled Google Cardboard VR


One of the places you can purchase Google Cardboard is on amazon.com.  It costs about $20.  Then you download virtual reality apps onto your iPhone or Android device, place your iPhone into the viewer, and you can tour the world in 3D.

Here is a video that explains a little more about Google Cardboard.  This video was created in June of 2014 and the app that is presented in the video is now a little bit different, but it is still awesome!

I’ve been taking Google Cardboard into second grade classrooms to coincide with their unit of study on maps. You can take an urban hike using the Google Cardboard app, and on your hike you will visit Venice, Rome, Monte Carlo, Paris, London, Tokyo, Jerusalem, and the Great Barrier Reef!

To preview the lesson, I created a tour using Google Tour Builder.  Here is the link to the tour of the Urban Hike.  After the hike, I explained the use of the Google Cardboard.  Make sure to explain to students to be careful when walking as you cannot see where you are going when you have the viewer up to your face.  It would be helpful to clear a space in the classroom for students to use when viewing.

After students had an opportunity to take the urban hike, I gave them paper to write about where they visited.  Here is the writing activity on a Google Document that you can share if you have your students on Chromebooks. Since I only had one Google Cardboard viewer, each student was able to view the urban hike for about two minutes.  I also printed and laminated pictures of the places they could view on the urban hike to assist them with their writing.

Untitled image.jpg

There are many other virtual reality apps that work with Google Cardboard.  If you search Google Cardboard, you will get a pretty good list of them, and I’m sure many more are being created!  There are roller coaster apps, an app showing Paul McCartnery in concert where you are on stage with Paul and you wear headphones to listen to “Live and Let Die.”  I have found apps on the Solar System, and a narrated walking tour in New York City!  Here is a great article about the Top 20 Google Cardboard apps.

So check out Google Cardboard!  It is lots of fun for adults too! I think I know some people in my family who are going to get Google Cardboard for a gift this holiday season!

Sep 27, 2015

Get Ready for El Nino!

With all the news about the upcoming monster El Nino, I thought I'd provide you with two really cool rainy day schedule ideas to add to your database of ideas.

Numero Uno:


Go Noodle.  Are you ready?  To what?  To pop.  Pop what?  Pop See Ko! (My favorite!)  Okay.  I know you already know how to Go Noodle in class, but did you know Go Noodle has indoor recess videos?  There are 10 indoor recess videos from 7 to 19 minutes long that will keep your students moving and motivated! I used some of these videos in my class last year on rainy days, and the kids really liked them!

Numero Dos:

Quiver Vision.  You're gonna love this!  (Thanks for showing me this, Adina!) Quiver is an example of augmented reality.  What is augmented reality, you ask?  According to whatis.techtarget.com, "Augmented reality (AR) is the integration of digital information with live video or the user's environment in real time. Basically, AR takes an existing picture and blends new information into it. One of the first commercial applications of AR technology is the yellow first downline in televised football games."


Quiver has free pictures that you can print out for your students to color.  Then using the iPad/iPhone/Android app, you can bring that picture to life!  Watch the video below to see how it works:


My favorite pictures are the Murphy and Friends soccer one where you can actually guide the lamb to kick the soccer ball into the net, and you totally have to check out Pudsey's 3D Doodle Disco! There are also coloring pictures that you could also use to fit into your curriculum.

So hopefully these two ideas will help to keep your students happy and busy during the upcoming rainy day schedules of El Nino!

Sep 13, 2015

Thinglink

Have you ever heard of Thinglink?  Thinglink.com/edu is a website where you can make images interacttive.  You can take a photo - the thing - and make it interactive with videos, text, audio, and documents - the link! Just imagine all the ways you can use Thinglink in your classroom! You can also create a free teacher account so you can add students, and they can join with a class code.  And...you can also search for other Thinglinks that have already been created, and if you like them, you can share them and use them!

Here is a Thinglink that I created for teachers who want to know more about some iPad apps you can use in the classroom:


Here is a Thinglink that I found when searching the keyword "education."  This teacher created an entire lesson on endangered animals using Thinglink.


Thinglink also has a blog, and here is a link to a post about how to use Thinglink in your classroom: Build Your Thinglink Classroom.

Isn't Thinglink cool?

Sep 4, 2015

Ideas for a 1 iPad Classroom

One question I received from a teacher this week was, "What can I do with 1 ipad in my classroom?" Well, here is a great idea from Laura Sugano, a fellow Ed Tech TOSA.


App of the week:  Choose an app that you would like students to use, and show students how to use it.  Place the iPad in a center-like location in the classroom along with a class list.  As students finish a turn on the iPad using the App of the Week, they can check off their name on the class list.  If the App does not produce a product that can be shared with the teacher, create a Google Doc or a handout to print to show evidence that they used the app.  If the app produces a product (such as Educreations), the teacher will be able to see the evidence on the iPad.


Here are some suggested apps that would be great for App of the Week:

Sushi Monster
Door 24
Math v Zombies
Spacecraft 3D
Virtual Manipulatives
Number Pieces
Educreations
Make Beliefs Comix
Brain Pop Jr
Haiku Deck
Tellagami
Kidblog

QR Codes - Create your own QR Codes that link to websites you want students to go to for research. You can also create QR Codes that show answers to math problems. If you are a Teachers Pay Teachers fan, there are many pre-made QR code activities. 

Pinterest also has many ideas for a 1 iPad classroom.

 iPad Apps for School is a great blog by Richard Byrne that showcases popular educational apps. You can sign up to and receive updates on apps.  I really found this blog useful when I used iPads in my classroom. Most of the featured apps are free or are very low cost.

So have fun checking out new apps for your students!


Aug 30, 2015

Homeworkopoly

A long time ago I went to an after-school seminar on behavior management strategies.  One of the best tools I took away from that seminar was HOMEWORKOPOLY!  Homeworkopoly is a motivating and positive way for keeping students on track.  There are so many ways to use Homeworkopoly, but I will tell you how I've used it.

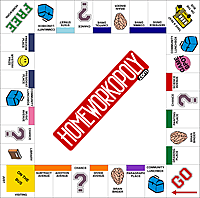
First you can download the game board and the Chance and Community Lunchbox cards from the Homeworkopoly website (click link above).  First, you print the Homeworkopoly board.  It will be about 10 pages long.  And then you cut it out and put it together to look like this:


I always take a big piece of white butcher paper, lay out the pieces of the game board, and then glue the pieces on the butcher paper with glue stick.  Then I fold the game board in half and laminate it so the front side is the side getting laminated.  Then I buy some stick-on Velcro, and I place two squares of Velcro on each space of the game board.

For playing pieces, since we were the Jaguars, I found an image of a safari hat and resized it, printed enough plus extras for my class on card stock, laminated them, and put a square of Velcro on the back so they would stick to the game board.  I labeled each playing piece with each student's name.

Now, not only do you have a behavior management piece in place, but you can also place the game board on your wall!  Then whenever you decide to play Homeworkopoly, you can take it down.  And it will last all year long.  At the end of the year, I always raffle off the game board, or give it to a chosen student.  Lots of "awwwws" from the students who don't win it.

Next, you will want to create your Chance and Community Lunch Box cards. The Homeworkopoly site gives you Chance and Community Lunchbox cards, and they also give you blank ones so you can create your own. I used some of theirs, but I have created a lot of my own.  My students have also given me many great suggestions over the years for other rewards to put on the cards.  Some of the favorite rewards I have used on the cards have been 15 minutes of free iPad time or computer time, being an office helper (I coordinated this with our office manager), using the teacher's chair for a day, and reading to a buddy class. After you have created and laminated your Chance and Community Lunchbox cards, you are ready to play!

Here is how I managed Homeworkopoly:  I only played Homeworkopoly once a week, on Fridays.  All students who did not sign the behavior/homework log for the week would get a turn on Homeworkopoly.  It would take my class 30 minutes to an hour to let each student get a turn. I would teach my two teacher assistants how to run it, and after they got the hang of it, they did it all on their own.  Then as the teacher assistants changed, I would have the prior teacher assistants teach the new assistants how to run it.  Last year, I even was able to get a parent to manage it, and it was great!

During recess on Fridays, I would take down the board and set the game up on a table with the dice and the Chance and Community Lunchbox cards.  I would also provide them with a class list of the students earning Homeworkopoly for the week, and I also made a checklist of the rewards they could earn on Homeworkopoly, so if a student earned that reward, the assistants would just place their name by the reward.  That way, you are not interrupted each time a student earns a reward.  I gave all rewards later in the day when I had time, or even the next week.

The two assistants running the game would call one student at a time for their turn; otherwise, too many students would be crowded around the board.  It would get quite noise during Homeworkopoly time, but, hey, my classroom is always a noisy one!  Usually during Homeworkopoly, I would put students on a math program such as Dreambox, TenMarks, or another math app, and I would pull small groups of students who needed some extra support or remediation on math concepts.

You'll notice on the Homeworkopoly board that not all spaces have a reward, so if a student landed on one of those spaces, they would get a Golden Ticket, and if they received 5 Golden Tickets, they would get a principal's signature (another highly sought-out reward).  Another great thing about Homeworkopoly is that you get to make up all the rules because you are the teacher!

If you have any questions or need a better explanation of ways to use Homeworkopoly, feel free to ask me!


Aug 24, 2015

Chrysanthemum Math Lesson

Here is a math lesson taken from Marilyn Burns.  This can be used as a back-to-school getting-to-know-you activity, but this lesson can also be used at any time during the school year. This lesson can also be adjusted to fit any grade level.  First read the story Chrysanthemum by Kevin Henkes to your class.  You can also play a read aloud of the story on YouTube.


After the story, there are many math activities you can do.  Here are some ideas taken from the Marilyn Burns lesson on Scholastic.com.

I have also created a Google Form where I have embedded the Chrysanthemum YouTube video.  (Here is the link to the Live Google Form.) You can share the form with students or add it as an assignment in Google Classroom so that students can watch the video on their own and then type in their first names and the number of letters in their first names.  The data will automatically be placed into a Google Sheet.  The data collected in the spreadsheet can be shown in many different ways.  You can show students how the spreadsheet can calculate the total number of letters in all of the students' names.  You can also insert a chart (insert>chart) and the charts that will work with your data will be displayed. You can choose the one you like, click on it, and it will be inserted right into your sheet.  Here is an EXAMPLE I created for this lesson.

Another idea you can use for the data is to have students calculate how much money their names are worth. Here is a Google Doc I created that can be shared with students or added as an assignment in Google Classroom.

And as always, feel free to copy any items I have created and edit and use them however you would like!

Aug 23, 2015

Math About Me Project

A math project I like to engage students in at the beginning of the school year is a project where students get to know each other by presenting numbers that are important in their lives.  You can have them share and present their math numbers in many different ways.  One way is by having them create a Google Slides presentation such as the one below.  You can also have them create a poster on construction paper.

Here is a link to the written directions.  Feel free to copy and edit as you wish.

I have students present their information to the class, and I grade them on following the directions, neatness, and their oral presentation.  Here is a Rubric that I created on rubistar.4teachers.org, a free website for creating and saving rubrics.  I also created a Google Form from the rubric and formatted a Spreadsheet so it will add up the grades and format them different colors.  So! Much! Fun!


Aug 22, 2015

Using KidBlog in the Classroom

Picture this:

Teacher (thinking): "Open house is coming soon, and I don't have any recent student work on the walls!  So I better finish that art project, that writing project, that math project, and get out my stapler! Plus I have to pull out all of the student work I've been saving all year and pass it out."

Sound familiar? Well, a solution to this problem is blogging! If you have your students start blogging at the beginning of the school year and have them blog once a week or even as little as once a month, you will have student work to share at open house. On open house night, students can log into their blog and display all of the writing and other work that they are proud of, and the parents will be very impressed with their child's blog and tech abilities.

There are a few different blogging platforms, but the one I have used for the past few years is Kidblog.  Kidblog is very easy to use, and you can set up your entire class for free! Plus, Kidblog has had a lot of cool upgrades in the past few months. One of the upgrades includes being able to upload from Google Drive right into a blog post!  Kidblog works anywhere, Chromebooks too! And there is an iPad app!

If you'd like more bells and whistles, though, you can upgrade to a premium account. It is regularly $36/year, but they are offering like a back-to-school special for $29/year. Kidblog is also very safe for students.  You cannot see anything on the blog unless you are logged in (which is why I'm not showing you my class blog from last year).

Next, you might ask, what can students blog about?  Well, they can blog about...just about anything!  My class typed blog entries on many different topics.  If we did an art project, they wrote about how they went about the process of creating their project, or they wrote about what they liked or disliked about their art projects.  If we went on a field trip, they wrote about what they learned. They typed up their informative, narrative, and opinion writing pieces. They wrote about math, and they wrote about science. We also added videos of newscasts and book trailers created on iMovie. We also did some green-screen videos and uploaded them to their blogs.  I also had a page in Kidblog, and I wrote and shared some photos and videos.

Here are a few examples of blog entries from one of my students from last school year. (These are posted with her parents' permission. Also I'd like to note that Lucie is a pretty amazing writer, but is working on her language conventions.)

This is a post about an art project:

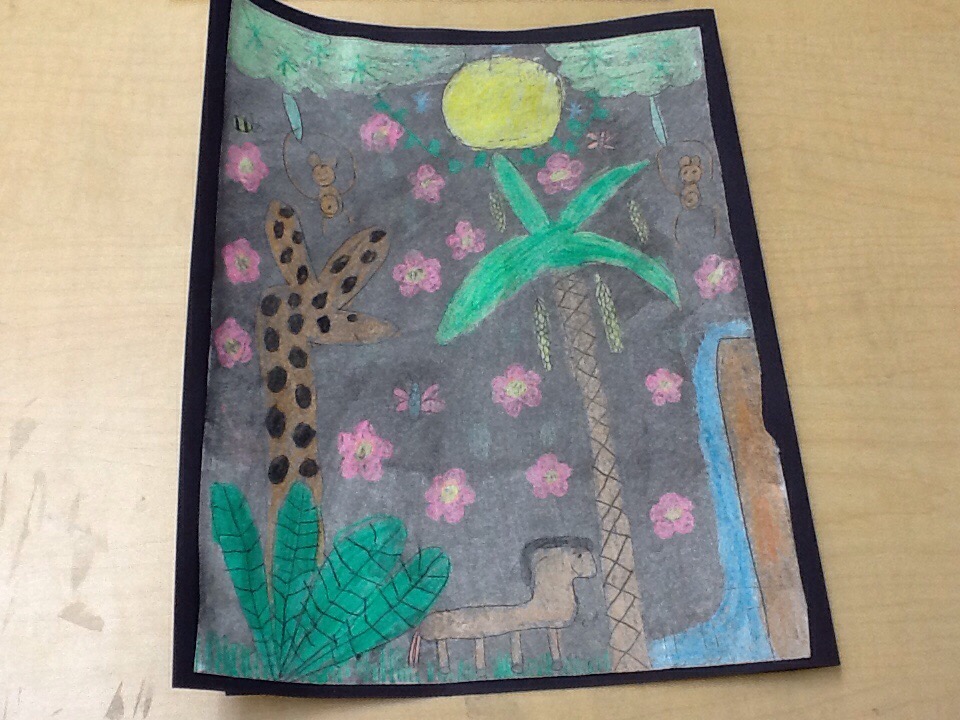
Nighttime jungle


This art project is a nighttime jungle. To create this piece of art, I drew plants, animals and flowers. Then I colored most, but not all of my jungle using regular and neon crayons. Then I painted on top of crayon with black paint, and the paint resisted the areas where I had crayon. I hope you like my nighttime jungle!
20150410-113841.jpg

________________________________________

This is a narrative writing piece, with a green screen video and other photos:

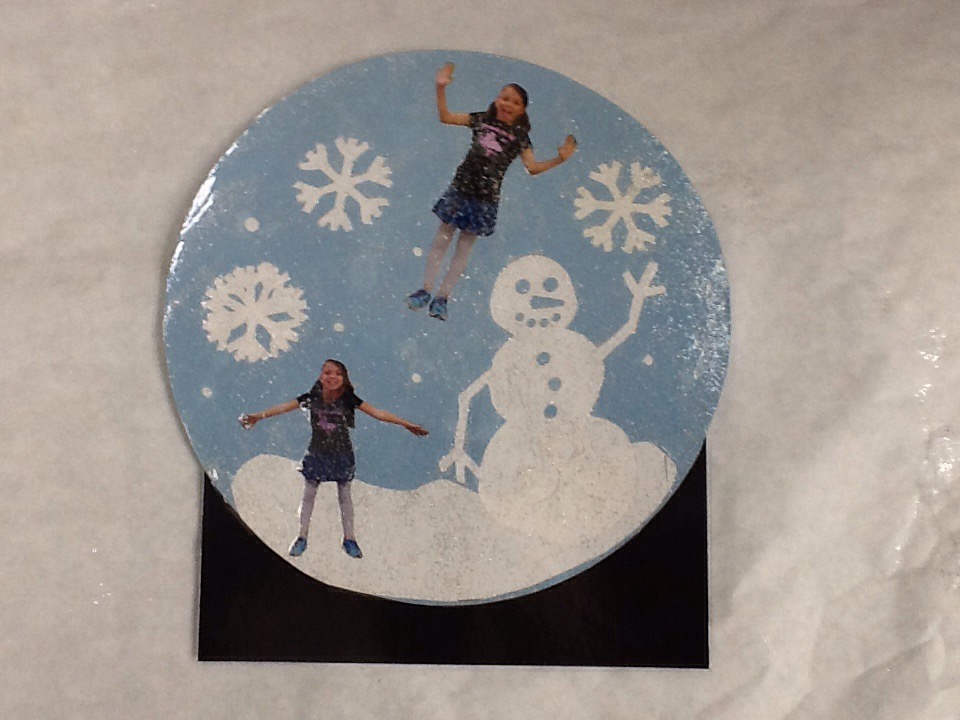
Trapped inside a Snowglobe


Trapped in a Snowglobe


On Christmas Eve we were watching a movie when I fell asleep. A little bit laterI felt fluffy snow on me and I thought I was out side but I wasn't I was in a snowglobe. 5 minutes later, I found foot prints so I followed them and they lead to a underground layer were I saw a evil snowman. After a while, I decided to say something to the president like snowman and I said hi he said hi back then I said why are you in here he said I am the person who trapped you in here. Zapp, he erased my memory then raised out of the layer as fast as he could. When I woke up I saw a very magical magic stick and so I picked it up and then BOOM! It electrocuted me and when it electrocuted me it broke the glass and I fanted. When I woke up I was in my bed fast asleep, and it was all a dream. So when I went to go and look at the snowglobe it was gone I
looked high and low but I could not find it that night I wish upon a star to go back in the snowglobe and when I woke up I was in the snowglobe. But what I didn't know was that there was another me IT WAS MY EVIL TWIN!she had a evil laugh ha ha ha ha ha! And she said I am the one who trapped you in here this time she said in her evil voice and then she said when you left you were still in here and now there are two of us and we must find that snowman so there will still be two of us but you just as evil as me uh I think you got it wrong we will both tern good no yes no yes we started fighting and poof she was gone and now she was just a picture on the snowglobe. In the end, I realized that all she ever wanted was a friend. Hey! If you want to meet this snowman he lives on 322 candy cane lane.
20150224-101940.jpg

________________________________________________________________________
One of the best things about blogging is that students are writing for an audience.  The students can read each other's posts and leave comments. So it is really important to have a mini-lesson on how to leave comments on another student's blog. But the good thing is that the teacher gets to see the comments and decide whether or not they are posted. I always tell my students that they should leave positive feedback and more than just a comment such as "Good job." I have them make a comment that is specific such as, "I like how you used the word "companion" instead of "friend" because that is one of our vocabulary words. You could also ask students to give feedback in the form of a suggestion for how to make a post better or more clear. I also tell students that a proper comment to a blog post only uses one exclamation point, not !!!!!!!!!!!.  You can start easy and then make commenting more advanced as students get better.

Oftentimes, I would give students a template to follow when writing their blog posts to help them.  Here are some examples for you.  I went to a presentation on using blogs in the classroom at a CUE conference, and the presenter gave us some of his templates to use, and I have taken some of those and altered them for my own use.
_ _ _ _ _ _ _ _ _ _ _ _ _ _ _ _ _ _ _ _ _ _ _ _ _ _ _ _ _ _ _ _ _ _ _ _ _ _ _ _ _ My Digital Portfolio 
(Beginning of the year)

I am a ___ grade student in _______'s class. I live in ____ with ________________. At school I like to _______. Out side of school I like to _________________. I have created this digital portfolio to share with my friends, family, and my teacher. Thank you for taking the time to learn more about me and my work!
_ _ _ _ _ _ _ _ _ _ _ _ _ _ _ _ _ _ _ _ _ _ _ _ _ _ _ _ _ _ _ _ _ _ _ _ _ _ _ _ _ Art Project

This art project is called ____________. To create this artwork, I _________. I am proud of my artwork because ________________. I hope you like my _______________________.

(Post picture of artwork.)
_ _ _ _ _ _ _ _ _ _ _ _ _ _ _ _ _ _ _ _ _ _ _ _ _ _ _ _ _ _ _ _ _ _ _ _ _ _ _ _ _

Field Trip

On (date) we went on a field trip to __________.We wanted to learn more about ________.  before our trip, three things I already knew about this topic is ___________, _____________, and _______________.  After our field trip, three new things I learned is __________, __________, and ________. Something I liked about our field trip is ______________. Something I noticed about our field trip is _________________. I still wonder about ________________________.

_ _ _ _ _ _ _ _ _ _ _ _ _ _ _ _ _ _ _ _ _ _ _ _ _ _ _ _ _ _ _ _ _ _ _ _ _ _ _ _ _

End of Year Reflection 

I really liked/disliked third grade.  My favorite part of the year was _______ because ____________.  The part I’ll miss most about this class is ________. Three things I would tell students coming to this class next year would be ________, __________, and ____________.  If I could change anything about this year, it would be ______________.  On to fourth grade!

_ _ _ _ _ _ _ _ _ _ _ _ _ _ _ _ _ _ _ _ _ _ _ _ _ _ _ _ _ _ _ _ _ _ _ _ _ _ _ _ _

So when you are ready to blog and need any assistance, I would love to help!


Aug 21, 2015

What I Am Project

I'd like to share another cool lesson/activity that I like to do during the first week of school. I believe I got this idea from Pinterest a few years ago.  I call it the "What I Am" project.

First I play this YouTube video featuring Will.I.Am singing with the Sesame Street Muppets. (Believe me, the students love this song!  I had to play it quite often throughout the year!) Then I play it again and ask the students to think about adjectives that describe them.

To help them, I provide them with an adjective list such as this one from Enchanted Learning. I also let them collaborate with their classmates to assist them. I ask them to write down at least ten words that describe them.

Then you can have students share these words in a few different ways.

One way I have done this is to print out this Pennant created as a Google Drawing and have the students write their adjectives in different colors and in different angles using colored pencils.  Then I cut out the pennants and put them on a bulletin board along with a picture of each student.  I try to do this before back-to-school night so something is on the wall.

Another way to do this is to upload the Pennant through a Google Classroom assignment and have them type their words on the pennant. This involves students inserting text boxes and rotating them or tilting them in different ways.

Another way to have students share adjectives that describe them is through a word cloud. One word cloud that works on Chromebooks is ABCya! (ABCYa! also has a free iPad app.) When you go to this site, you can choose any grade, from 2 to 5, and scroll down and find the word cloud button that looks like this:


Click on the word cloud and type in your adjectives. Click the arrow button, and then you are able to edit your word cloud and randomize the words, change the colors, the layout, and the font. When you are satisfied with your word cloud, you can save it to your drive or print it out, or even better, a student's word cloud could be uploaded and shared on their blog so other students can see and comment!

This is so much fun!  Here is the word cloud I created: 


If you happen to do this lesson in your class this year, I would love to see your examples!  Also, if you come up with a better way to do this lesson, please share with your comments!

Learning Styles Inventory

Every year during the first week of school, I give my students a Learning Styles Inventory that determines if students are visual, auditory, or kinesthetic learners. The students love finding out what type of learners they are.  After I assess the students, I make posters for the classroom that I can leave up all school year.  I have used this learning styles inventory for many years, and I can't even remember where I found it, probably through an Internet search. This year, I have transformed the paper document into a Google Form!  Feel free to copy and use this as you wish. Please note that with younger students, the assessment may need to be read aloud, and certain questions and answer choices will need to be explained as there is higher-level vocabulary contained within the assessment.

You can click HERE to access the Learning Styles Inventory

*I set this link so you can make a copy of the form for yourself. If you want to see the live form, click on "View Live Form" in the tool bar.

Now on to the spreadsheet that the form will create.  After your students have finished answering the questions, a spreadsheet will automatically be created from the answers.  You can also customize your spreadsheet as I have done at this link:


You can determine what type of learner a student is by the way they answer the questions.  If a student has mostly "A" answers, then they are considered a Visual Learner.  If a student has mostly "B" answers, then they are considered an Auditory Learner.  If a student has mostly "C" answers, then they are considered a Kinesthetic Learner.

Back to the spreadsheet I created, I placed conditional formatting on the answers that the students will choose. Every time a student chooses "A," the cell will turn red for visual; choosing "B" will turn the cell blue for auditory, and choosing "C" will turn the cell green for kinesthetic.  I also wanted to insert a format to add up the row colors to determine which color appeared most frequently, but I don't know how to do that, nor could I find any add-ons or other search information that would tell me how to do this.  So I just did the calculating part myself.  

Then I added another sheet to house the answer keys, and this sheet could be shared with the students so they could click on the learner types and read about their characteristics.

I hope you consider giving this a try in your classroom at the beginning of the year. Feel free to contact me if you have any questions or suggestions on how to improve my form or spreadsheet, and feel free to copy and use what I have created.

UPDATE TO POST:
Thanks to @LaurieAnastacio, the spreadsheet has been formatted to count the As, Bs, and Cs so you can determine a student's learning style right away!  Once your students complete the form, you would have to drag the formatting down the columns.